If you dream of biting into a soft, fluffy brioche, you’re in the right place! In Brioche Moelleuse Maison: Flavorful Homemade Delight, I’ll share everything you need to create this delicious treat. From the best flour choice to perfecting the dough and even baking tips, I’ll guide you step-by-step. With a few key ingredients and techniques, you can craft a brioche that impresses everyone. Let’s dive in!
What Are the Essential Ingredients for Making Brioche?
Making brioche starts with the right ingredients. Each one adds to the flavor and texture.
What Type of Flour Should You Use for Brioche?
I recommend using all-purpose flour for brioche. It gives the bread a nice balance of strength and softness. You can also use bread flour if you want a chewier texture. The key is to find flour that has enough gluten. This helps the dough rise well and gives it a light feel.
Why Is Fresh Yeast Preferred in Brioche Recipes?
Fresh yeast is best for brioche. It activates quickly and gives a strong rise. This means your brioche will be fluffy and light. If fresh yeast isn’t available, you can use active dry yeast. Just make sure to activate it in warm milk first.
What Other Ingredients Contribute to Fluffy Texture?
Butter is crucial for a fluffy brioche. It adds richness and moisture, making each bite melt in your mouth. Eggs also play a big role. They help bind the dough and give it color. Sugar adds sweetness, while salt balances the flavors. Each ingredient works together to create a delicious brioche. You can find all these ingredients in the Full Recipe.
How Do You Prepare the Brioche Dough?
To make brioche dough, you start with the yeast. First, you need to activate it. This step is key. You mix the yeast with lukewarm milk and a teaspoon of sugar. Let it sit for 5-10 minutes. The yeast will get frothy, showing it is ready to use.
Next, you need a large bowl. In this bowl, combine flour, sugar, and salt. Mix them well. Make a well in the center. Add the yeast mixture and the eggs. Mix everything together until you see a rough dough. Don’t stir too much; just combine the ingredients.
Now, it’s time for the butter. You want to add it slowly. Take one cube of softened butter at a time. Mix until the butter is fully absorbed. This can take 10-15 minutes by hand or 5-7 minutes with a stand mixer. The dough should feel smooth and elastic.
Once your dough is ready, cover the bowl with a towel. Let it rest in a warm area for 1 to 1.5 hours. The dough should double in size during this time. When it has risen, punch it down gently to remove excess air.
Now you can shape the dough. Turn it out onto a lightly floured surface. You can divide it into three parts for a braided brioche or smaller pieces for rolls. Shape each piece and place them in greased pans.
Cover the shaped loaves again and let them rise for about 45 minutes. While they rise, preheat your oven to 180°C (350°F). Before baking, brush the tops with an egg wash. This gives a lovely golden finish.
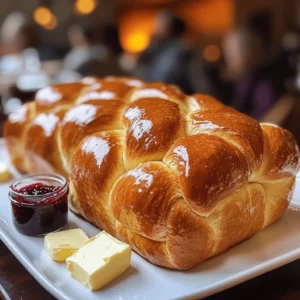
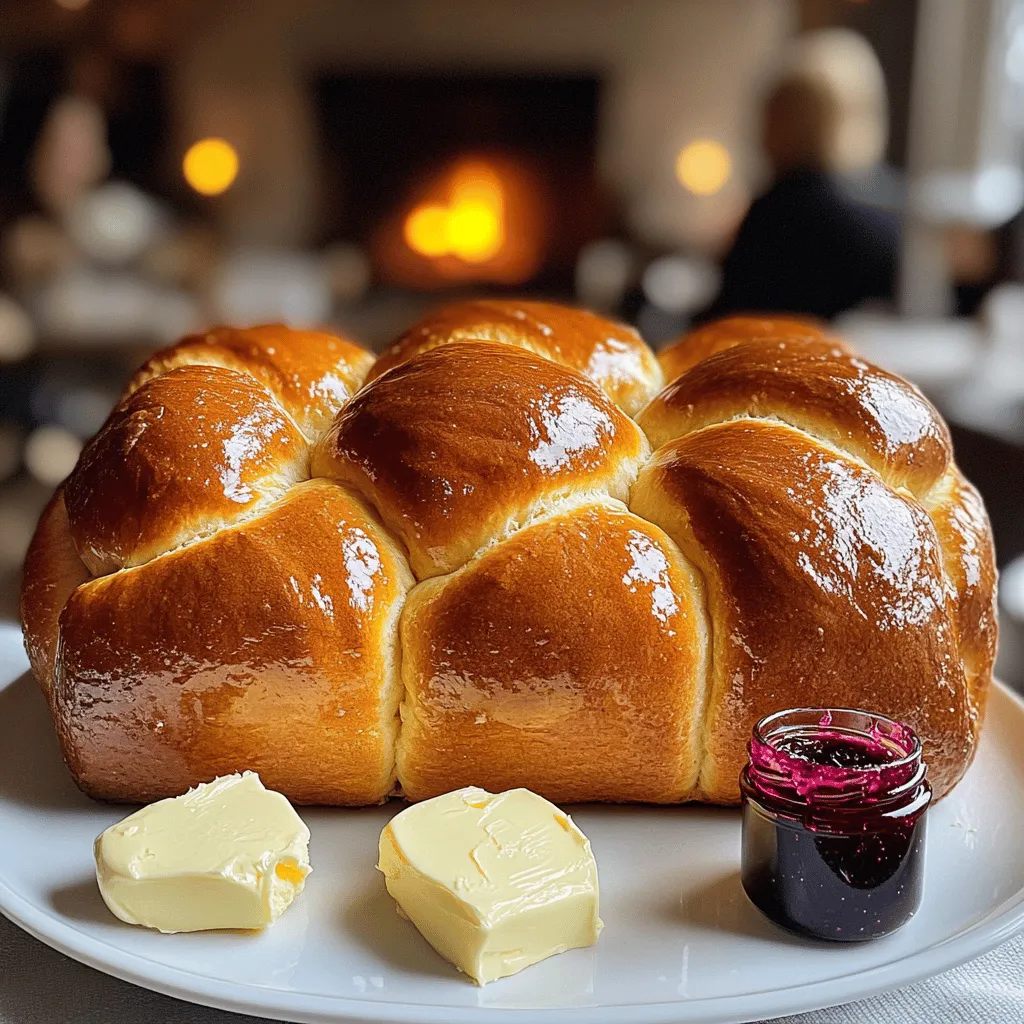
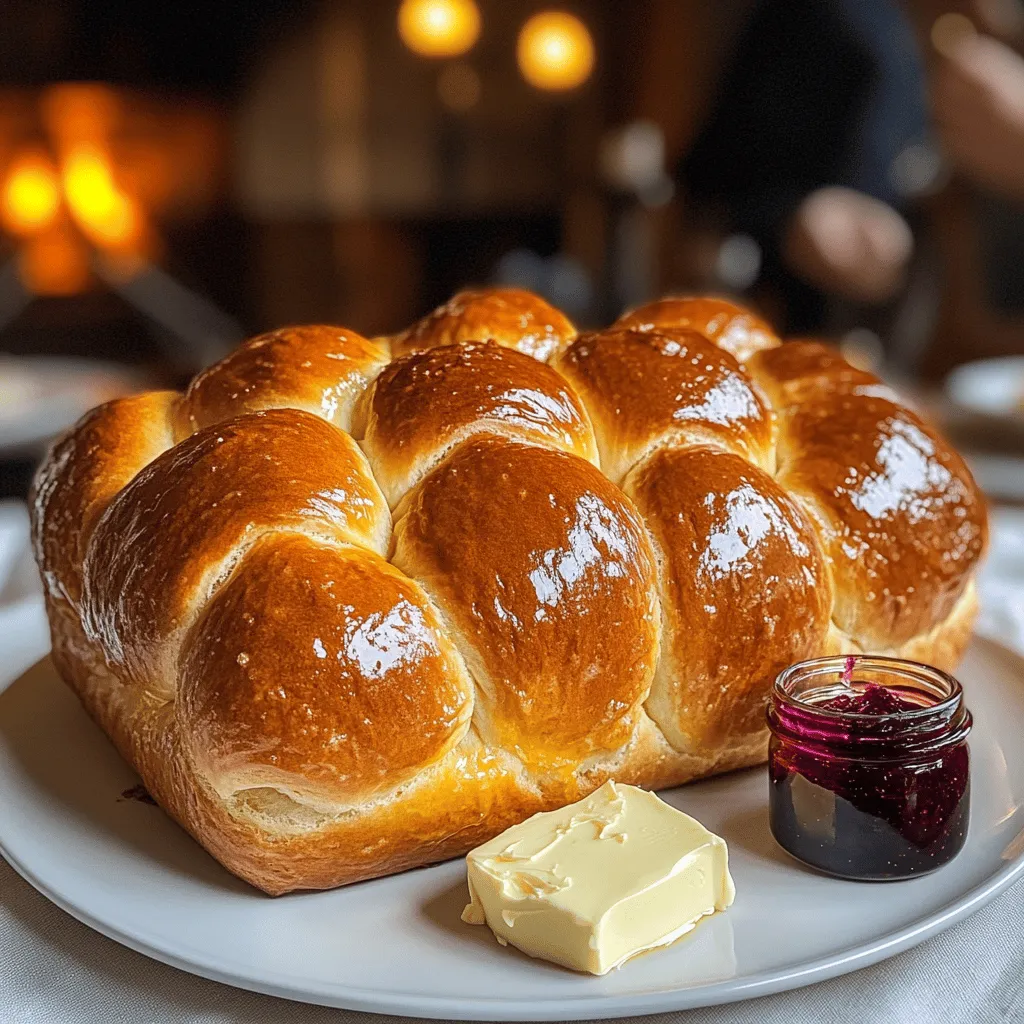
Finally, bake the brioche for 25-30 minutes. It should be golden brown and sound hollow when tapped. Enjoy the delightful process of making this homemade brioche. For the complete recipe, check out the Full Recipe.
What Is the Proofing Process for Perfect Brioche?
Proofing is key for making brioche. It helps the dough rise and develop flavor. Proper proofing gives your brioche a light and airy texture.
How Long Should You Let the Dough Rise?
You should let the dough rise for 1 to 1.5 hours. This time allows the yeast to work its magic. The dough should double in size. After the first rise, shape the dough and let it rise again for about 45 minutes. This second rise is just as important. It helps create that fluffy, soft texture we all love.
What Factors Influence the Proofing Time of Brioche?
Many factors affect proofing time. Temperature is the most important one. A warm kitchen speeds up the rise. Cold rooms slow it down. Humidity also plays a role. A moist environment helps the dough rise better. The yeast type matters too. Fresh yeast acts faster than dry yeast. Always keep an eye on the dough. Look for it to double in size, not just the clock.
What Are Common Mistakes to Avoid During Proofing?
One common mistake is not covering the dough. Always cover it with a towel to keep it warm. Another mistake is using too much flour. This can dry out the dough. Be gentle when shaping. Overworking the dough can make it tough. Lastly, don’t rush the proofing. Patience is key. Give your dough the time it needs to rise. Perfect proofing leads to a delicious brioche. For a detailed recipe, check the Full Recipe.
What Are the Best Techniques for Shaping Brioche?
Shaping brioche is a fun part of making this soft bread. You can create many styles. Each method offers a unique touch to your baking.
What Are Different Ways to Shape Brioche Loaves?
You can shape brioche into various forms. A round loaf is simple and classic. Just form a ball with your dough. For a more elegant look, consider a batard shape. This is a longer, oval loaf. You achieve this by rolling the dough into a rectangle, then folding the sides inward. Finally, roll it up tightly.
How Do You Create a Braided Brioche?
Braiding brioche adds a lovely touch. Start with three equal pieces of dough. Roll each piece into long strands. Then, pinch the tops together. Braid the strands by crossing them over each other. Make sure to keep the braid tight, but not too tight. This method allows the dough to expand while baking.
What Should You Know About Making Individual Brioche Rolls?
Making individual rolls is a great option. Each roll can be a perfect treat. First, divide the dough into smaller pieces. Shape each piece into a ball. Place them in a greased muffin tin or on a baking sheet. This method allows for easy serving and sharing. Plus, you can enjoy fresh rolls right from the oven.
These shaping techniques make your brioche not just tasty but also beautiful. For a complete guide on making this delightful bread, check the Full Recipe.
How Do You Bake Brioche for Optimal Results?
To bake brioche well, you need to focus on a few key points. First, the right temperature is key. I find that 180°C (350°F) works best. This heat cooks the bread evenly. It helps to achieve that lovely golden color on top.
Next, how long should you bake brioche? I recommend around 25-30 minutes. A good sign it’s ready is when the top is golden brown. You can also tap the bottom. If it sounds hollow, it’s done!
Now, let’s talk about achieving a fluffy and soft texture. One tip is to add softened butter slowly. This helps the dough hold air. Knead the dough well to develop gluten. This process makes the bread light and airy.
Another tip is to let the dough rise properly. I let mine double in size during the first rise. This can take 1 to 1.5 hours. The second rise also matters. Let it rest for about 45 minutes after shaping. This extra time helps improve the texture.
I often use a kitchen thermometer to check the internal temperature. Perfect brioche should reach around 90°C (190°F) inside. This ensures it’s fully cooked but still moist.
For more detailed steps, be sure to check the Full Recipe. Enjoy your baking!
What Are Some Creative Variations and Serving Suggestions for Brioche?
Brioche is a blank canvas for your creativity. You can add many sweet fillings to make it special. Some popular choices are chocolate, almond paste, or fruit preserves. Just roll your dough flat, spread your filling, and roll it back up. Bake it as usual for a delightful surprise inside.
For breakfast, I love to serve brioche with fresh fruits and a sprinkle of powdered sugar. You can make tasty French toast with it too. Just soak slices in a mix of eggs and milk, then fry them until golden. Top with maple syrup or honey for a sweet start to your day.
When it comes to serving suggestions, think beyond breakfast. You can make elegant sandwiches with brioche. Try ham and cheese for a savory treat. Or, spread cream cheese and add smoked salmon for a brunch classic. The soft texture pairs well with rich flavors.
If you want to impress guests, serve brioche with homemade jams or whipped cream. It looks lovely on a wooden board, inviting everyone to enjoy. You can also toast it lightly and serve with butter for a simple yet tasty snack.
Each of these options makes brioche more than just a bread. Experiment with flavors and fillings to find your favorite. You’ll be surprised at how versatile this dough can be. For the full recipe, check out the instructions provided earlier. Enjoy your baking journey!
Making brioche is both art and science. We’ve explored the key ingredients, such as the right flour and fresh yeast, which help create that light texture. Proper dough preparation and proofing time matter greatly for success. Techniques for shaping and baking are vital to achieve perfect results. Finally, experimenting with creative variations adds fun to your brioche. With these tips, you can confidently make delicious brioche at home. Enjoy the journey of baking and share your tasty results with others.